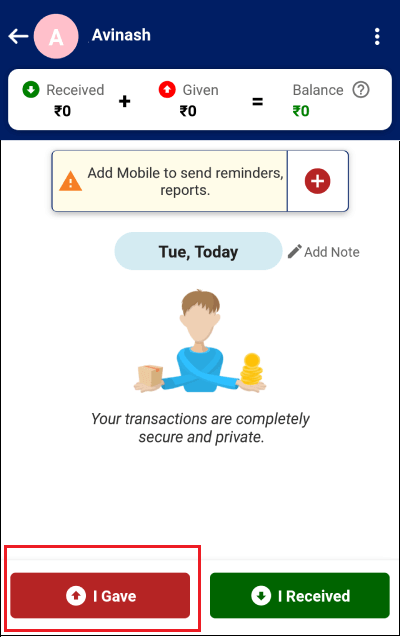
Once the EMI service is enabled then click on the Add Party button to create the party. On the party details page click on I Gave button.
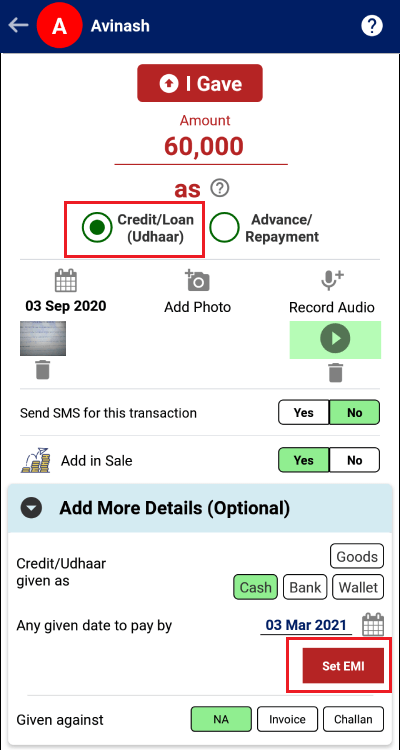
The Set EMI option will be shown in the case when you select Credit / Loan (Udhaar) option and here you have fillup the required information.
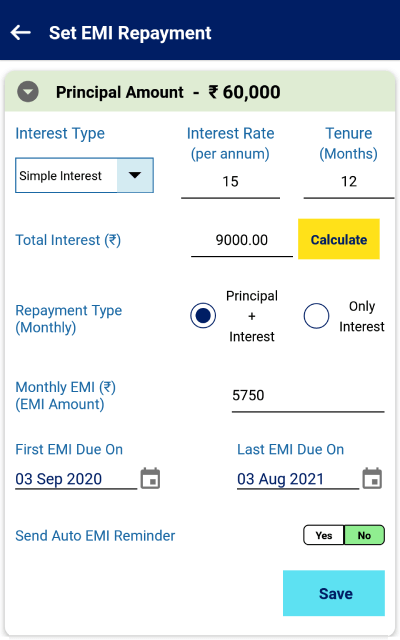
Before submitting the entry, click on Set EMI button and a new screen will open. You have to select interest type (like Simple Interest, Compound Interest or No Interest), fill Rate of Interest, Specify EMI Tenure and click on Calculate Button. Based on this selection Total Interest, Monthly EMI will be auto filled . You have to specify the EMI start date and based on tenure the End Date will be auto populated.
Case-1 : Simple Interest
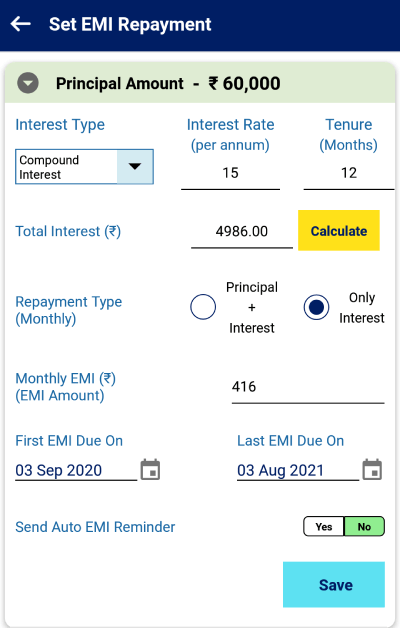
Case-2 : Compound Interest
Case-3 : No Interest
On clicking the Save button the new entry will be created.
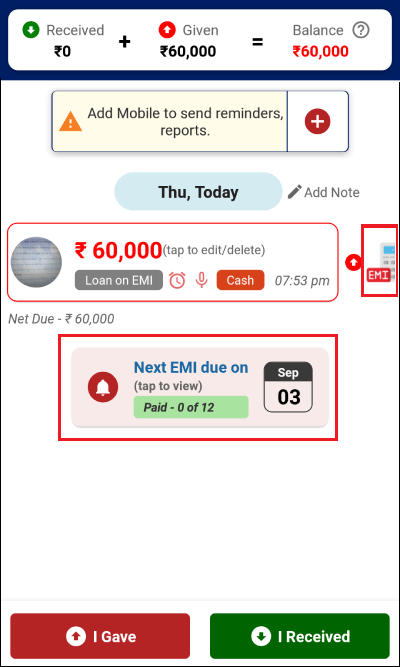
You will be redirected to Party Details screen where you can see the entry with the EMI symbol. You can also see the EMI reminder with the information on how many EMI has been paid out of total EMI's.
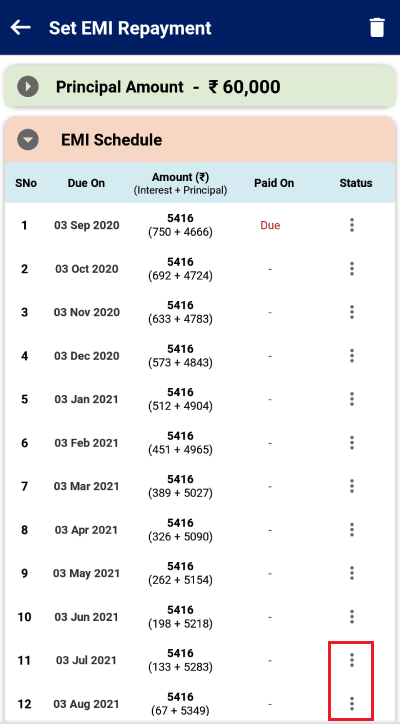
On clicking the entry, you can see the details of the EMI and the entire EMI schedule. The EMI schedule specifies the Interest and the Principle amount paid in each EMI with current EMI status.
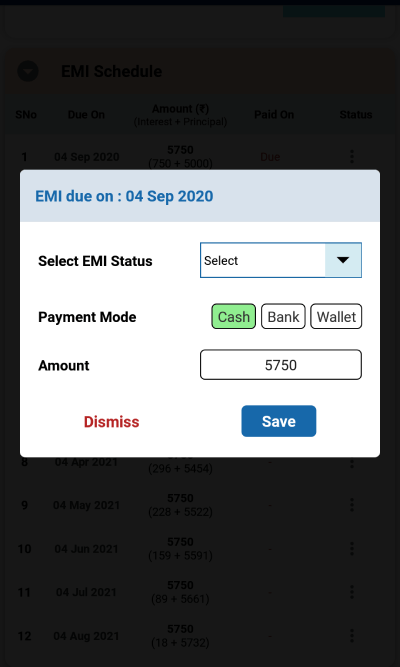
The status of each EMI can be set as well on clicking the status field ( Three vertical dots). Here you can select the Status, Payment Mode, Amount (Autofilled) accordingly.